
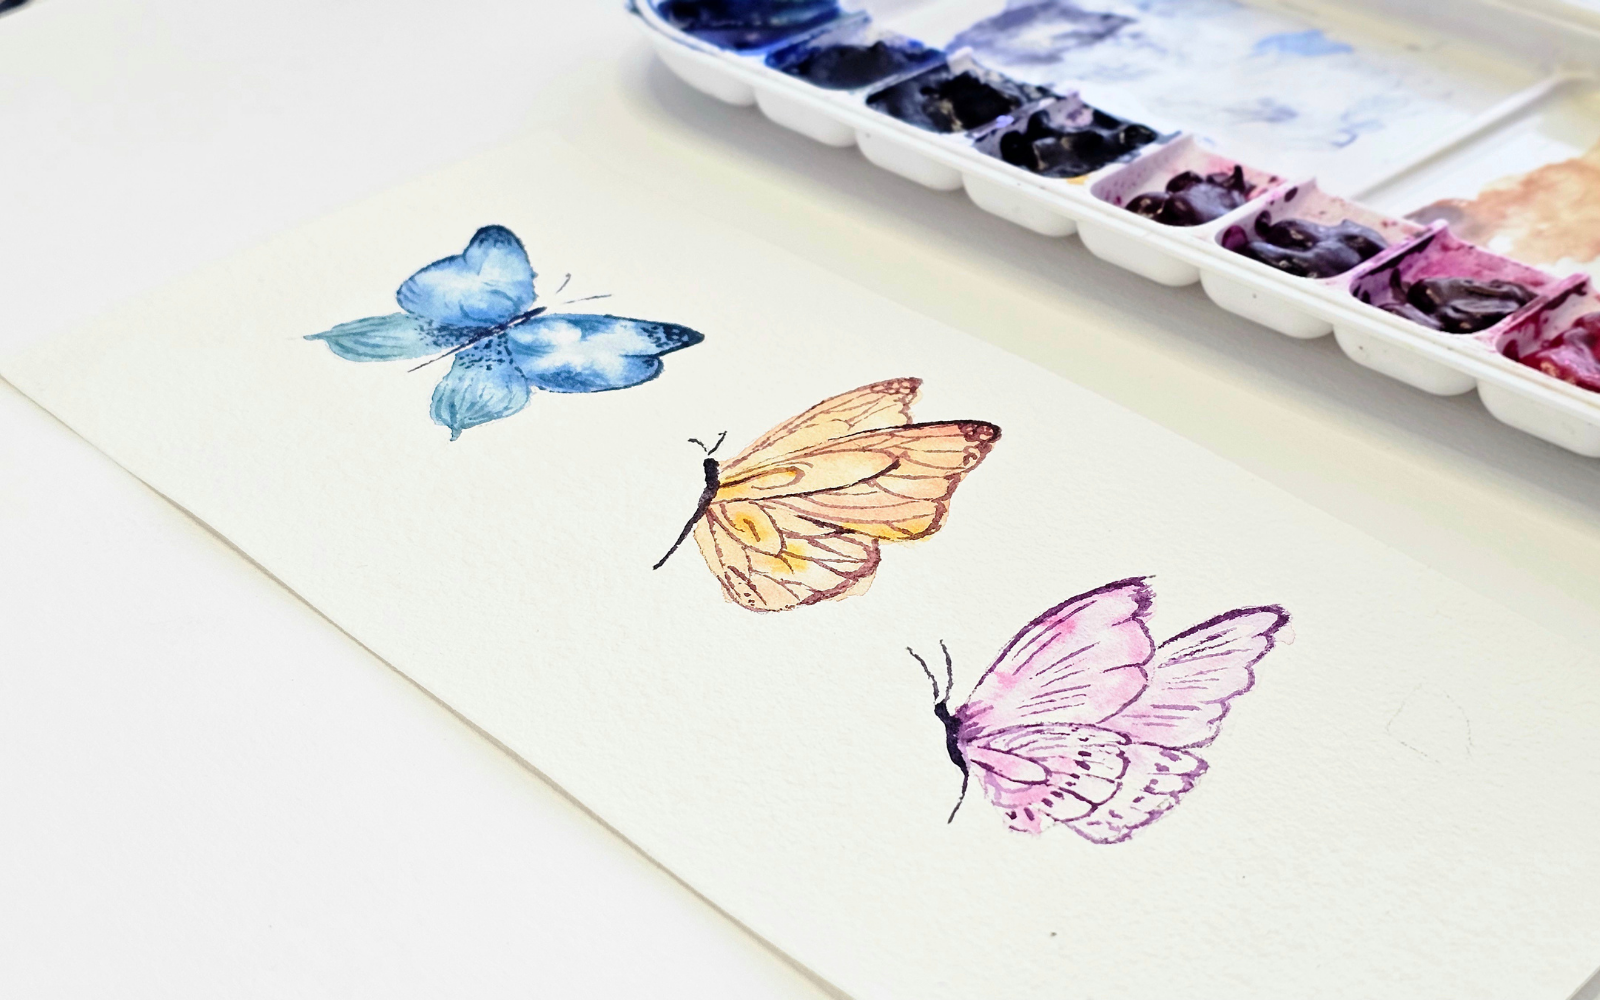
If you’re ever bored and want something fun and quick to paint, then watercolor butterflies are the way to go!
They’re also an excellent warm-up exercise to get your creativity flowing.
Let’s get into it…
Materials
Aside from the basic supplies, you don’t need all that much when painting these butterflies:
- Watercolor paper– 100% cotton cold pressed paper.
- Brushes- Round brushes size 8 for backgrounds and size 2 for details.
- Watercolor paints
- Paper Towel- For removing excess water from the brush or lifting
- 2 Jars of Water- One for rinsing your brush and one for loading with clean water
- Hb pencil– To draw the outline of the butterflies
Color Mixtures
I have included the color mixtures for reference; however, feel free to get creative and use what you have on your palette.
I did my best to keep the color mixtures very simple, limiting myself to a light shade for the background and a darker shade for the patterns on top.
Blue butterfly:
- Background: Pthalo blue (red shade) + a small touch of lemon yellow
- Pattern Layer: Pthalo blue + Paynes gray
Orange Butterfly
- Background: Permanent red deep + Gamboge = Orange shade
- Pattern: Permanent red deep + Gamboge + Paynes gray (small touch)
Pink butterfly
- Background: Permanent Rose (a watery mixture to get a lighter value)
- Top Layer: Carbazole Violet + Bordeaux
Making the drawing
This exercise does require some drawing skill, however I’m not going to go into too much depth on how to draw the butterflies.
To make things interesting, I decided to draw the butterflies at three different angles. The first from above and the second two from the side with the wings flying.
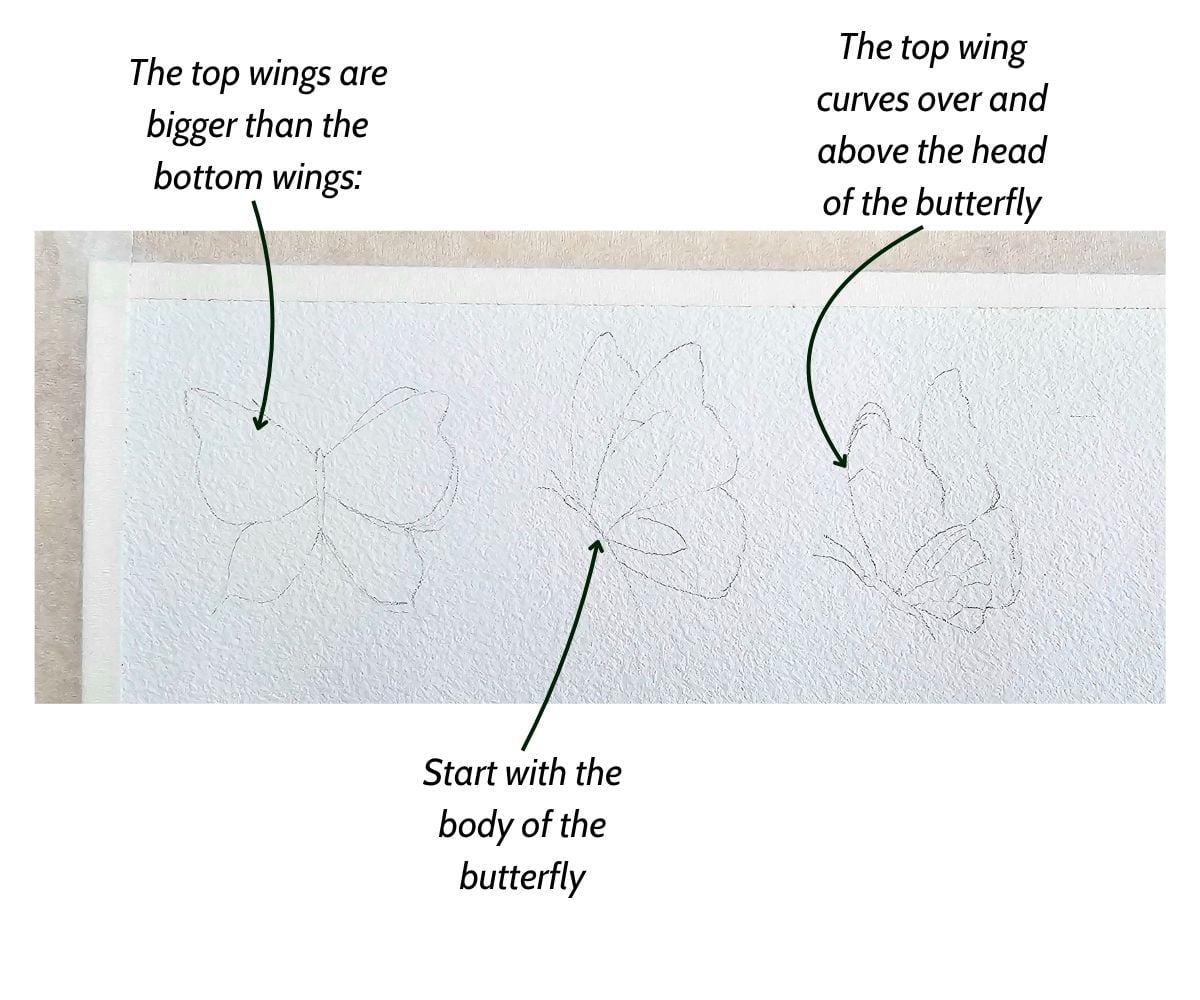
To draw the butterflies, start with the body and antennae. Then, on either side, draw the top wings as symmetrical as you can get them. Use gentle pressure with your pencil so that you can erase lines if you need to.
You’ll want to make sure the proportions are right. The wings should curve above the head, then draw the sides of the wings and back into the middle of the body.
The bottom wings should be smaller than the top wings and also be longer than the body.
I have a diagram below to help elaborate:
Blue Butterfly
Now that the outlines are out of the way, let’s start with the background washes.
- Start by wetting the butterfly wings with clean water. There should be no puddles and a nice even sheen.
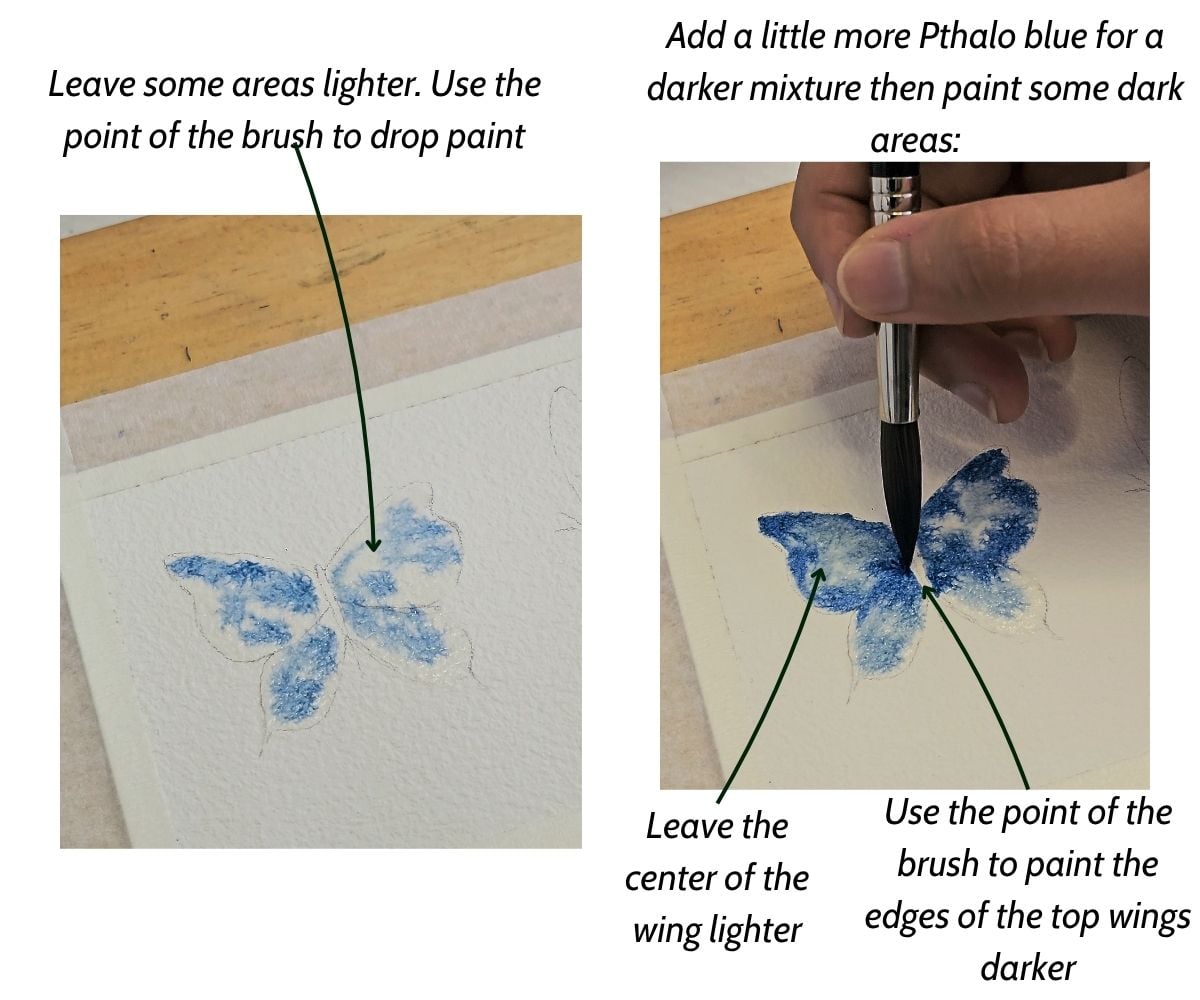
- For the background, I used a wash of Pthalo blue and a small touch of lemon yellow. I made sure not to cover up all the white of the paper, so I’m dropping paint along the edges of the butterfly.
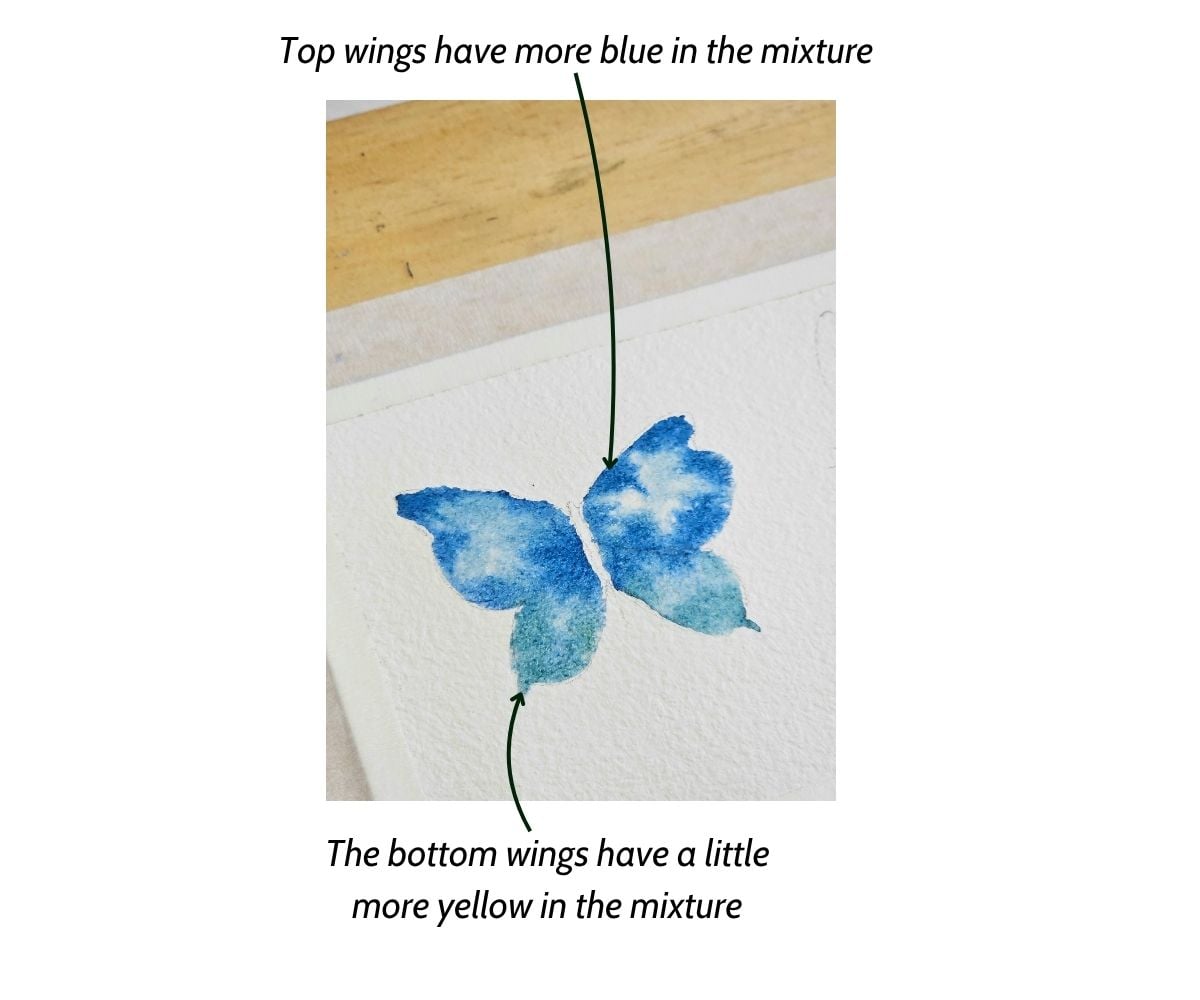
- Add more pthalo blue to the mixture to get a more bluish shade and drop in some of that color into the corners and edges of the top wings. Make sure not to cover up those lighter spots.
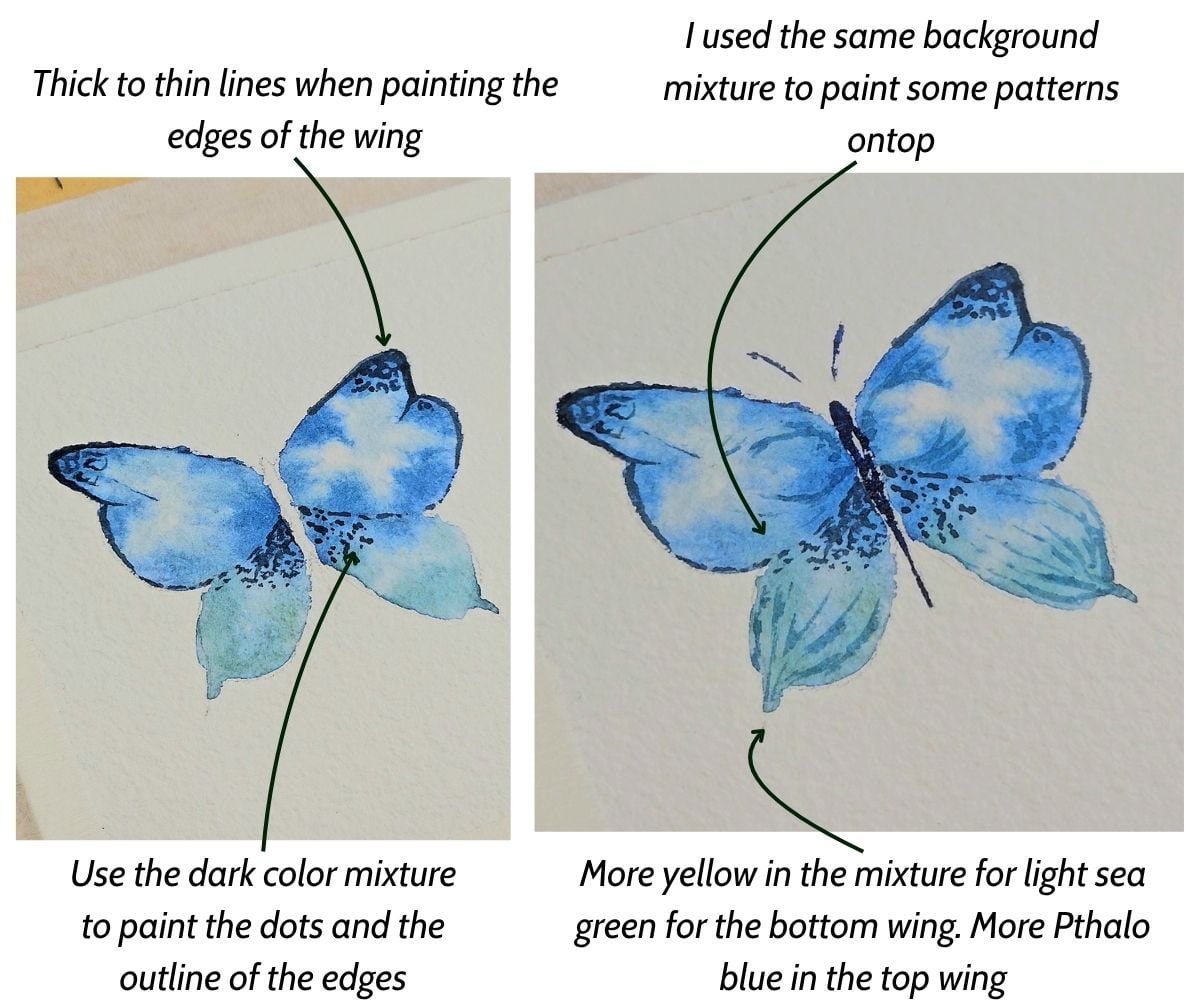
- I used slightly more yellow when painting the bottom wings to get a sea green shade.
- Next, rinse and dampen your brush on a paper towel, then lift the centers of the wings. This creates a luminous effect and makes the butterflies look more striking.
- Let it dry.
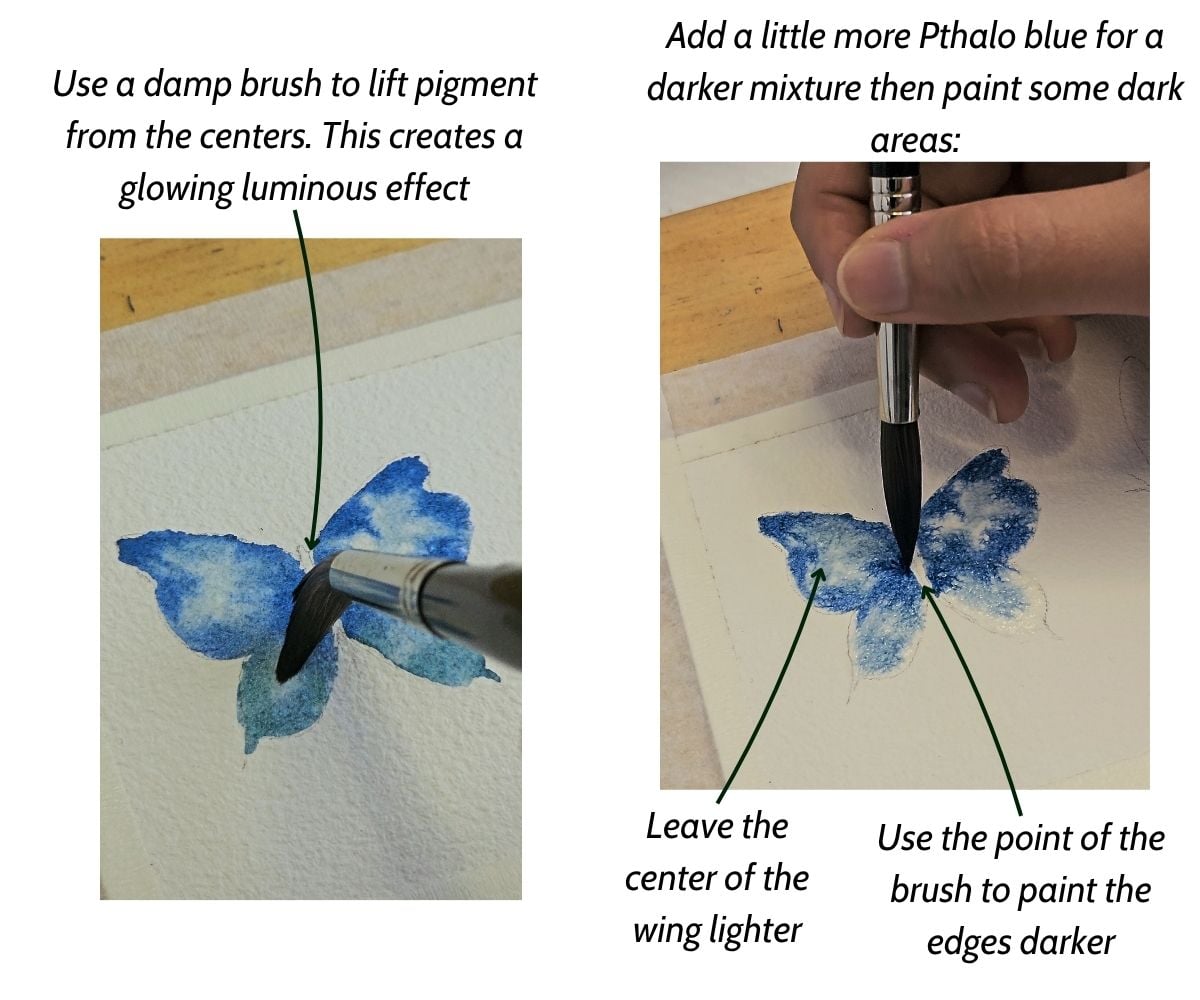
Now that the background is done and dry, mix the same shade as the background for layering. Then, for the darkest parts, add a touch of Payne’s gray to the mixture.
- Switch to a smaller brush for the details.
- You can choose any pattern that comes to mind.
- For mine, I started with some close tiny dots along the inside of the wing. I also added a few circles and thickened the outlines of the wings.
- To paint the butterfly itself, I added Payne’s gray for a dark mixture.
Orange butterfly
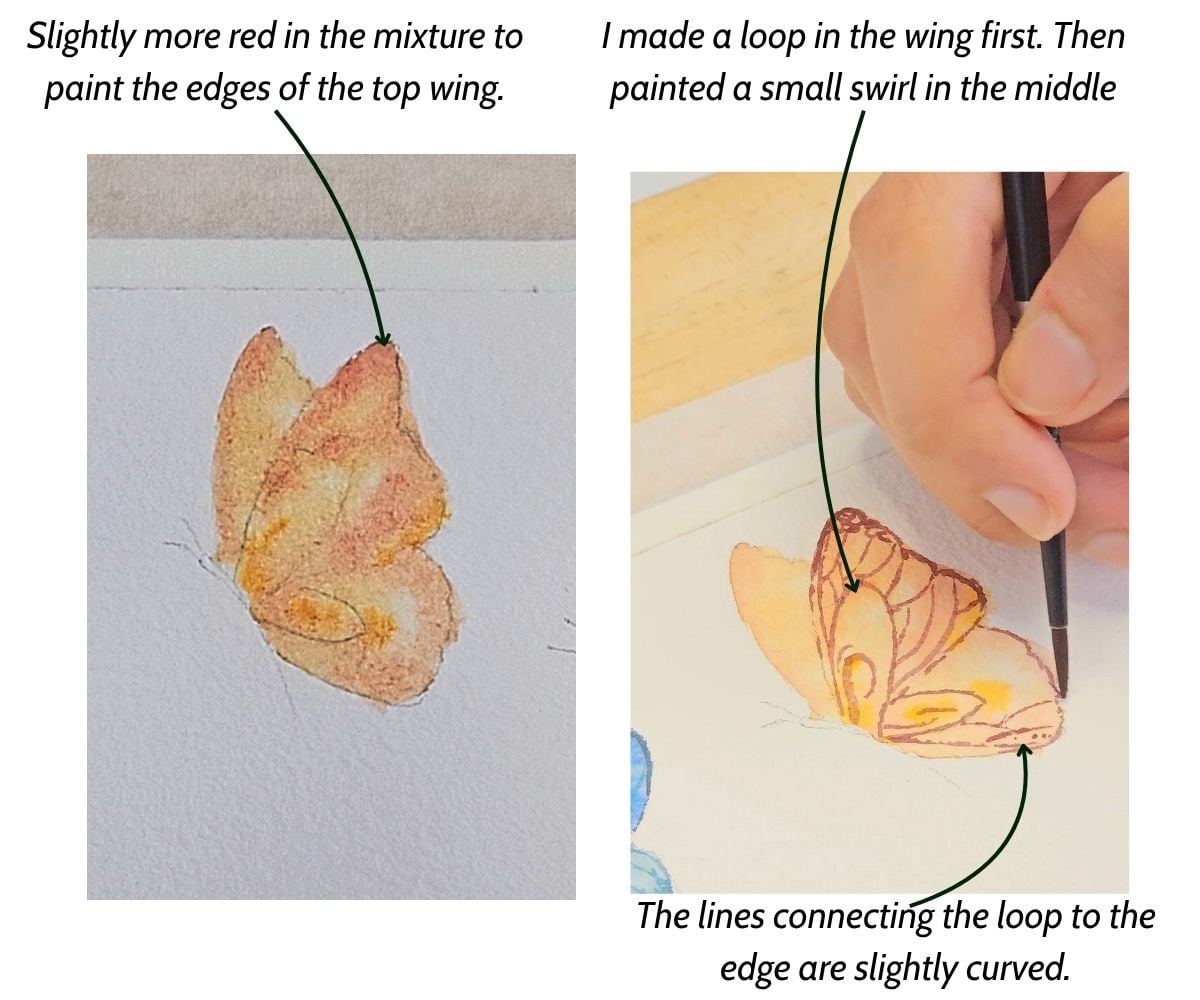
To paint the orange butterfly, I used the same process: a light background shade and a dark shade for the body and antennae.
The only difference is I didn’t lift the paint and used a different pattern and color.
- Start by wetting the wings with clean water, then drop in with the point of the brush some of the orange mixture. I used permanent red deep and gamboge. You can use cadmium red or pyrrol scarlet as an alternative.
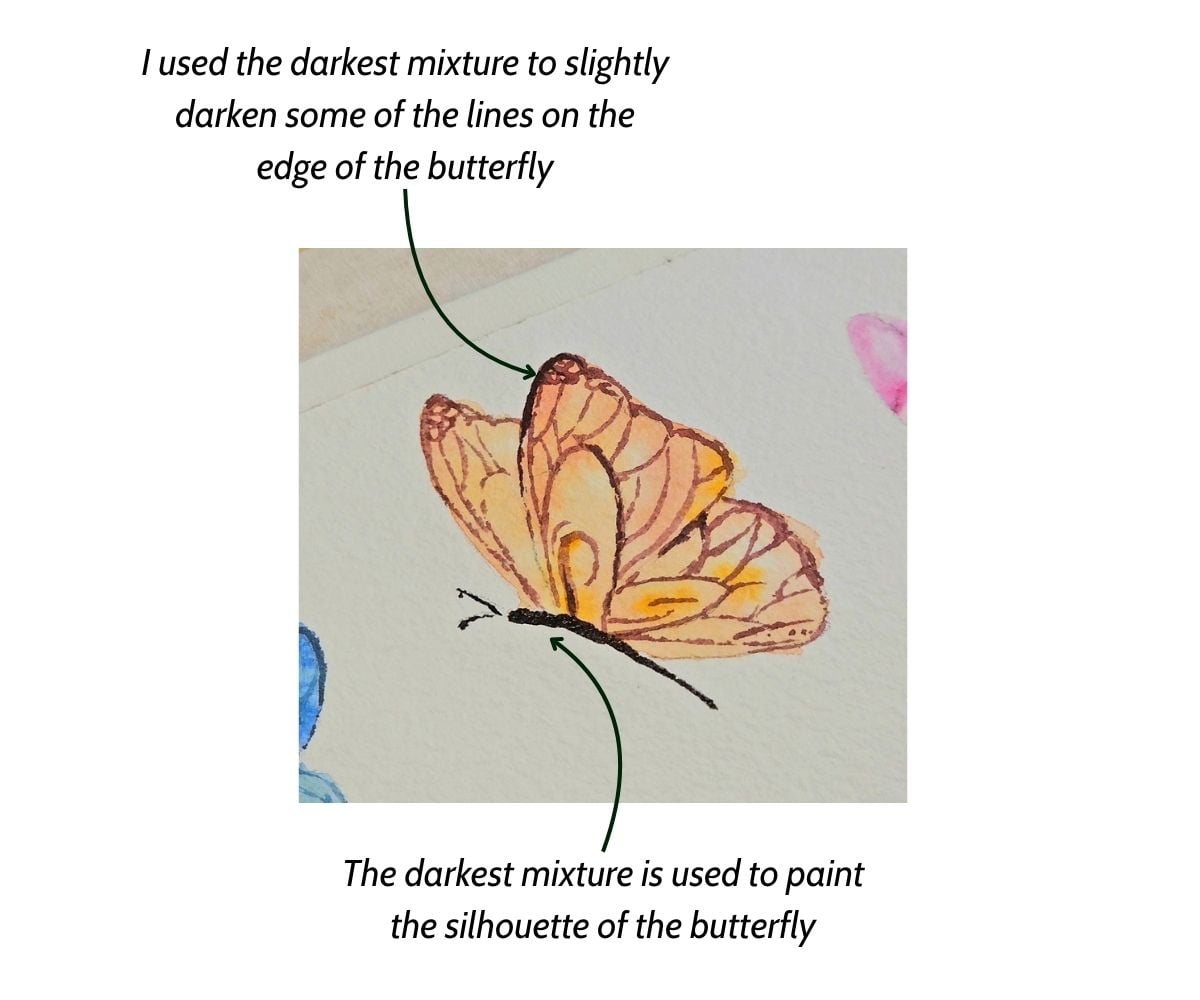
- Allow the paint to dry completely, then mix a darker redish brown shade using permanent red with a touch of carbazole violet.
- This time I drew a curved oval line, then more lines going from the oval to the edge of the wing. Notice how the lines slightly curve along the wing.
- To paint the body, use a dark shade by adding Payne’s gray.
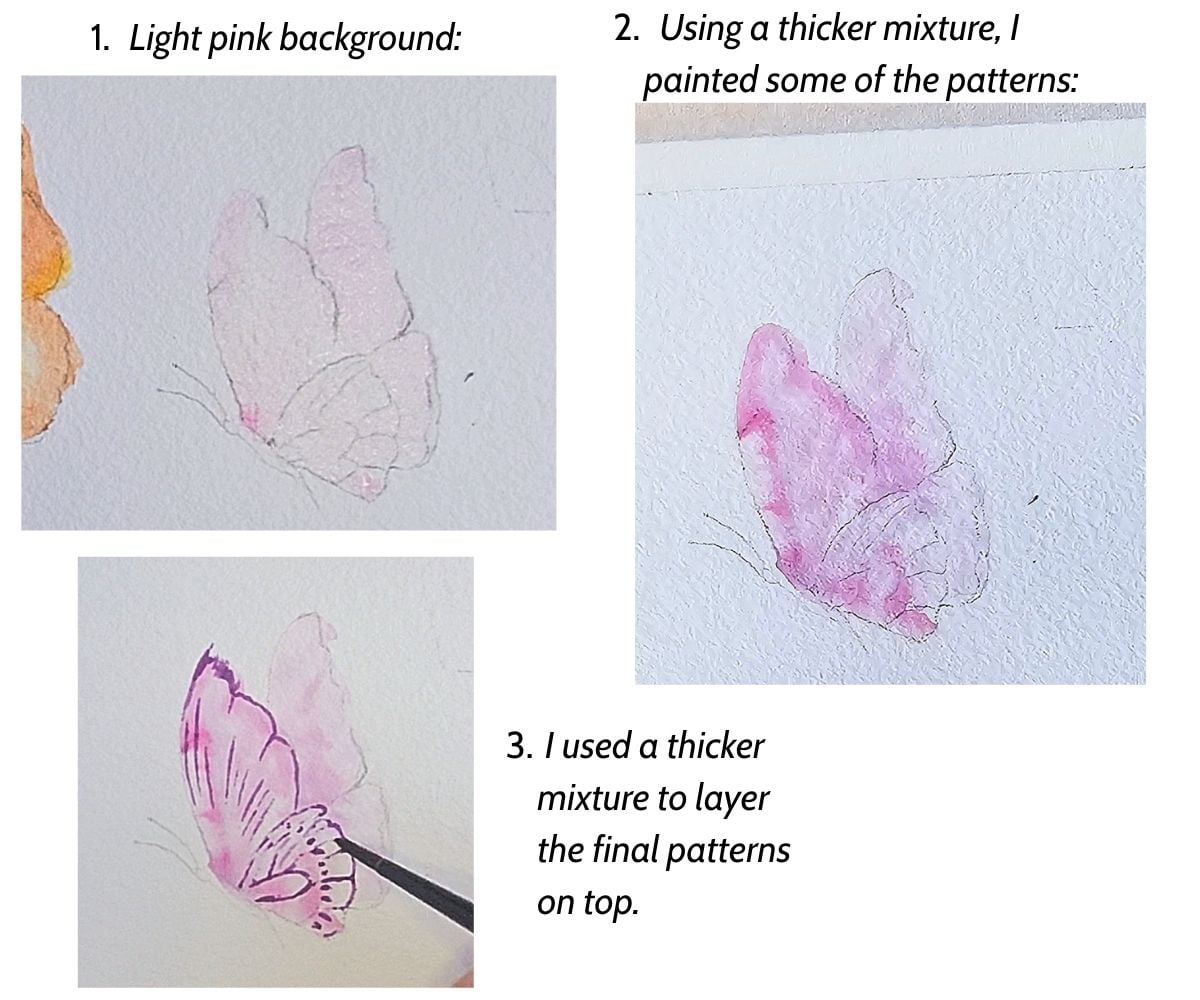
Pink butterfly
Once again using the same process, the only difference is the color.
I used permanent rose for a light background wash. Then a mixture of carbazole violet and bordeaux to get a purpleish color.
For this butterfly, I drew some textured edges on the edge of the wing, and combined lines and dots for the details.
You can see the details in this diagram:
That’s the end of this quick tutorial. I hope you enjoyed painting along with me, and if you enjoyed this quick exercise, check out these ones below: